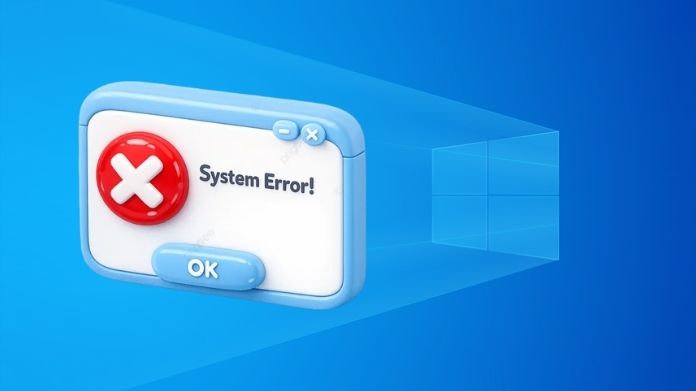
Have you ever attempted to format a USB flash drive or SD card to FAT32 on Windows, only to receive an error of FAT32 Format Failed?
Sometimes when formatting drives in Windows, you will receive an error that says “Windows was unable to complete the format” or “The volume is too big for FAT32.”
This can be really annoying if you are just trying to format a USB drive to FAT32. The issue is not your USB drive. Most times, this is an issue with Windows.
Microsoft has built in restrictions when formatting drives in Windows. The restriction is especially visible when working with larger drives.
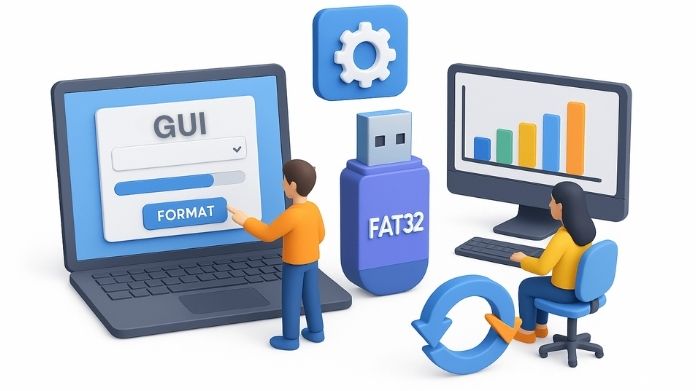
Fortunately, there is a simple solution. Using a simple application called GUI Formatter, you may get around this constraint and format big disks to FAT32 in seconds.
With the appropriate technique, what appears to be a complex mistake may typically be resolved in a matter of minutes.
What is the FAT32 Format Failed Error?
When Windows is unable to finish formatting a USB device or memory card, the FAT32 format failed message displays.
The system halts in the middle and shows an error message rather than effectively preparing the disk.
You find yourself in this situation when you try to format a USB drive larger than 32GB (i.e., a 64GB or 128GB drive) with the built-in formatting tool that comes with Windows.
There can also be problems with the drive itself; for instance, it might contain some file system errors or be used on several different computers.
It seems sense that when this occurs, a lot of consumers believe their USB drive is broken.
In actuality, though, the driving is often good. Rather than a hardware malfunction, the issue is more frequently connected to Windows formatting restrictions.
Why Windows Fails to Format Drives to FAT32?\
Windows 32GB FAT32 Formatting Limit
Possibly the largest contributing factor to why you see this error is a limitation Windows places on you.
By default, the format tool that Windows gives you will not format as FAT32 drives larger than 32GB.
This can be confusing because the FAT32 file system itself can technically support much larger storage sizes.
However, Windows intentionally hides the option for larger drives and instead recommends formats like exFAT or NTFS.
Many people resort to basic tools like GUIFormatter as a result of this restriction.
Large disks may be formatted to FAT32 without the limitations of the Windows formatting tool, thanks to these programs.
File System Errors or Minor Drive Issues
Sometimes formatting just doesn’t work right because of these little errors in the file system on the drive.
Like, if you pull out the USB without doing it properly or plug it into a bunch of different computers, stuff gets messed up a bit.
Windows detects this and pauses what it is doing, displaying something like “FAT32 format failed” or “it could not finish.”
I believe that utilizing another tool to reformat it helps the majority of the time. It resolves discrepancies quickly, but it is frustrating when it happens unexpectedly.
How to Fix the FAT32 Format Failed Error Using GUI Formatter?
Sometimes Windows just won’t let you format a drive to FAT32, and that can be annoying.
I think using GUI Formatter is one of the fastest ways to fix it. It’s not too hard; you don’t really need to know a lot about tech stuff to get it done.
Step 1: Download the GUIFormatter Tool
You can grab the GUI Formatter tool from somewhere reliable online. Since it’s this tiny portable thing, there is no setup or anything like that.
Just download it and put the file somewhere on your computer, maybe the desktop or whatever.
Step 2: Insert Your USB Drive
Get your USB plugged in, and give it a second for the computer to notice. It should show up in File Explorer with a letter assigned to it. That part is usually quick.
Step 3: Launch the GUI Formatter Application
So, first and foremost, launch the guiformat.exe file that you downloaded.
It starts up immediately away, and this small window appears. There’s nothing particularly special about it. The entire process is straightforward; there are no options to navigate.
Step 4: Select the Correct USB Drive

In the tool’s drive selection field, pick the appropriate drive letter for your USB device. It is generally a good idea to double-check this step to ensure that you have formatted the proper disk.
Step 5: Start Formatting the Drive
Once everything looks correct, click Start to begin formatting the USB drive to FAT32. The tool will immediately begin preparing the drive.
Step 6: Wait for the Process to Finish
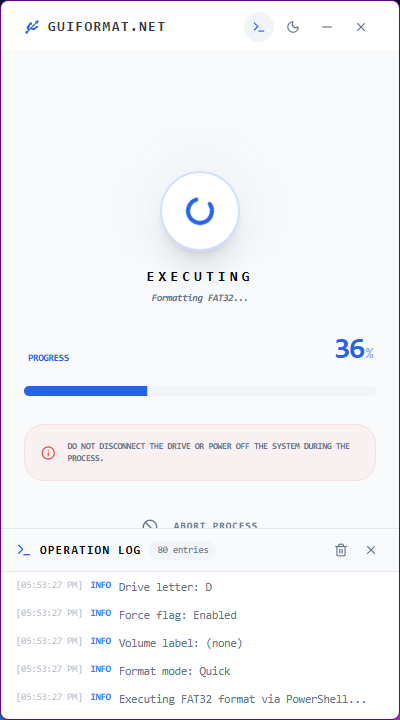
In most cases, the formatting process takes only a few seconds. Once it completes, your USB drive should be ready to use with the FAT32 file system.
Why GUI Formatter Works When Windows Formatting Fails?
Many people wonder why this small tool succeeds where Windows fails. The main reason is that GUI Formatter does not enforce the same restrictions that Windows does.
Some key reasons it works so well include:
- It bypasses the 32GB FAT32 limitation found in Windows formatting tools
- It focuses specifically on FAT32 formatting, making the process more efficient
- The interface is simple and easy to understand
- It supports larger USB drives such as 64GB, 128GB, and even larger storage devices
Because of these advantages, the tool has become a popular choice for users who need to format larger drives for devices that require FAT32.
Things to Know Before Formatting
Before starting the formatting process, there are a couple of important things to keep in mind.
- All data will be erased: Formatting deletes everything on the USB drive, including files and folders.
- Back up important files: If there’s anything important on the drive, make sure to save a copy before formatting.
- Check the drive letter carefully: Always confirm you selected the correct USB drive to avoid formatting the wrong device.
Final Words
The FAT32 format failed error can be confusing at first, especially if Windows keeps refusing to format your USB drive.
More often, it comes from the formatting restrictions built into Windows, particularly the 32GB limit for FAT32.
Fortunately, this issue may be easily resolved with the appropriate equipment. Larger drives may be easily formatted to FAT32 using programs like GUI Formatter.
Once you know how it operates, fixing this problem is easy and quick, making the seemingly difficult process a matter of minutes.


