If you’ve ever tried installing Windows or fixing a broken PC, you’ve probably heard about create bootable USB drives.
They’re incredibly useful but also a bit frustrating when things don’t work as expected. One of the most common issues people run into? The USB simply won’t boot.
In many cases, the problem isn’t the USB itself; it’s the file system. That’s where FAT32 comes in.
In this guide, I’ll walk you through the steps of creating a bootable FAT32 USB drive.
There is no need for guesswork or advanced language, but rather a straightforward approach that even non-technical persons can follow.
What You Need Before You Start?
Let’s make sure you have everything ready before we begin the procedure. This eliminates interruptions in the middle and saves you time.
Here’s what you’ll need:
- A USB drive (at least 8GB is recommended)
- A Windows computer is also necessary.
- Ensure you have a stable internet connection to download Windows files.
- Two tools are essential:
- GUI Formatter formats your USB to FAT32
- The Windows Media Creation Tool create bootable USB.
Remember, backing up your USB drive is crucial before starting anything else. Formatting will erase everything on it. If there’s anything important on it, copy it somewhere safe first.
Step-by-Step Guide to Create Bootable FAT32 USB Drive
Now, let’s begin the real procedure. It’s simpler than it seems, so don’t worry.
Step 1: Format the USB Drive to FAT32 Using GUI Formatter
First, we need to ensure that your USB is correctly formatted.
Windows does not always provide the FAT32 option for bigger disks, so we utilize a program like GUI Formatter.
Here’s how you do it.
- Download GUI Formatter from a reliable source.
- Plug your USB drive into the computer.
- Check the drive letter (this is important, you don’t want to format the wrong drive)
- Run GUI Formatter with admin rights.
- Pick your USB drive from the options listed.
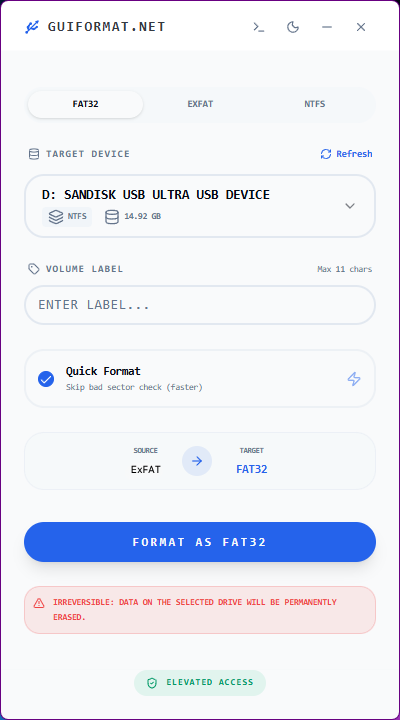
- Select the type of the formatting you want (Quick format / Full Format)
- Hit “Format” and give your confirmation. It’ll be over in just a few seconds.

Once it’s done, your USB will be formatted to FAT32 and ready for the next step.
Step 2: Create Bootable USB Using Windows Media Creation Tool
Now that your USB is formatted correctly, it’s time to turn it into a bootable drive.
Here’s what you need to do:
- First, go to Microsoft’s official site and grab the Windows Media Creation Tool.
- Fire it up and agree to the license terms.
- Next, opt for “Create installation media.”
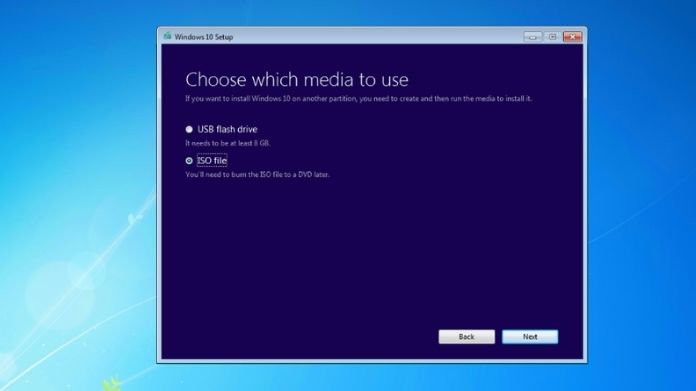
- Choose your language, edition, and system type.
- When prompted, select “USB flash drive” and pick your USB from the list.
After that, the tool will take over. It will download the necessary files and set everything up for you.
Depending on your internet speed, this process may take some time. Feel free to leave it running while you do other things.
Once completed, eject your USB carefully. There you have it: a completely working bootable FAT32 USB!
Why FAT32 is Important for Bootable USB Drives?
Let’s keep this simple.
FAT32 is a file system that is widely compatible across several systems and devices. Bootable USB devices must be compatible with UEFI systems (which are used by the vast majority of modern computers).
The problem is that not every machine can boot from exFAT or NTFS. Therefore, even if your USB appears to be in great condition, your computer may disregard it entirely when it first boots up.
However, FAT32 is nearly universally recognized. For this reason, the majority of official tools and installers depend on it.
Now, there is one small catch: FAT32 has a 4GB file size limit. That may seem like a dealbreaker, but in fact, products like the Windows Media Creation Tool handle it automatically. So don’t worry too much about it.
Wrapping Words
And there you have it, a simple, reliable way to create bootable FAT32 USB drive.
If you’ve previously experienced boot troubles, this procedure frequently solves the problem since it provides maximum compatibility with various platforms.
Before using your USB, make sure BIOS/UEFI allows USB booting; this step is often missed. Also, keep the USB ready for reinstalling Windows or troubleshooting startup problems.
If you found this useful, you may want to look at more tips on USB formatting and system recovery. They can save you a lot of time if things go wrong.


