Ever plug a USB drive into your TV or game console and get nothing? The drive works fine on your computer, but the device just won’t see it. Most of the time, it’s not the drive’s fault; it’s the file system.
Windows typically uses NTFS as its default file system, which is really good for handling big files and offering strong security.
But, you’ll find a lot of devices still lean towards FAT32 because it just works with more things. That’s why people are always searching for ways to switch their drives from NTFS to FAT32.
The tricky thing about converting the NTFS to FAT32 is that it’s not that simple.
Since these are two different file systems, the process usually involves formatting the drive, which can erase everything on it.
The good news? If you are ready to follow all necessary steps, there is nothing that could prevent you from safely switching to FAT32.
In this guide, you’ll learn the safest way to convert NTFS to FAT32, back up your files, format the drive using GUI Formatter, and restore your data afterward.
Why Convert NTFS to FAT32? Can You Do It Without Losing Data?
NTFS suits well for Windows; however, FAT32 is more suitable for use with devices such as smart TVs, gaming systems, digital cameras, and other media players.
For this reason, many users decide to switch from NTFS to FAT32 when working with USB sticks or SD cards.
The problem is that Windows is not the best tool for doing that.
This operating system does not provide an option for conversion of NTFS to FAT32 without formatting, and sometimes does not even allow FAT32 formatting of large disks.
The safest approach is simple:
- Back up your data.
- Format the drive as FAT32 using GUI Formatter.
- Restore your files.
It may seem complicated, but it is the only safe method that helps to avoid any problems with the loss of files.
It can be likened to the situation when one has moved to a new place and, before settling down, they first have to sort their things out, then once the place is ready, they move in again. Similarly, formatting a file system involves the same procedures.
How to Safely Convert NTFS to FAT32 Without Losing Files?
Step 1: Back Up Your Data

Backing up is essential before formatting.
- Connect Your Drive: Allow Windows to identify your NTFS USB, SD card, or external drive after plugging it in.
- Copy Files: Move all files to a safe location, like another drive or cloud storage.
- Verify Backup: Open a few important files (photos, videos, documents) to ensure everything is copied correctly.
- Confirm Backup: All of them have been successfully transferred – time for the next step.
Step 2: Format the Drive to FAT32 Using GUI Formatter
Now it’s time to convert the drive.
Many users are surprised to discover that Windows often doesn’t offer a FAT32 formatting option for larger drives. This is where GUI Formatter becomes especially useful.
It’s an easy tool for switching big USB drives and storage devices to FAT32. No need to mess with command lines or confusing menus.
- Download and Launch GUI Formatter: Download GUI Formatter, open it up, and you’ll see a user-friendly interface. Seriously, anyone can figure this out.
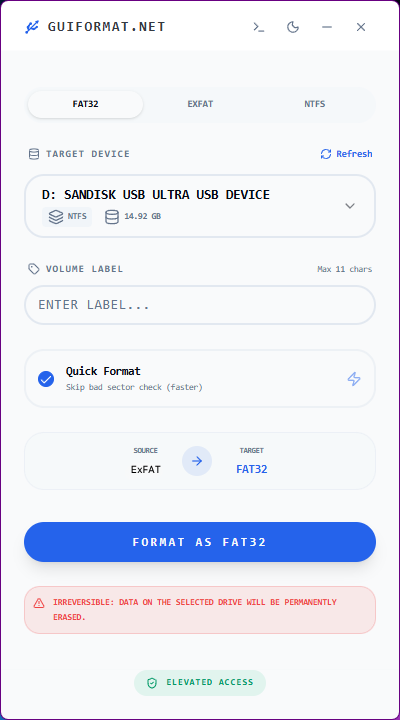
- Select the Correct Drive: Choose your drive wisely. Make sure you have the correct one since formatting erases everything.
- Choose FAT32 Format Settings: Select FAT32 as the file system. In most cases, default settings work fine and don’t need changes.
- Start the Formatting Process: Hit the format button. The tool erases NTFS and sets up a fresh FAT32 file system for you.
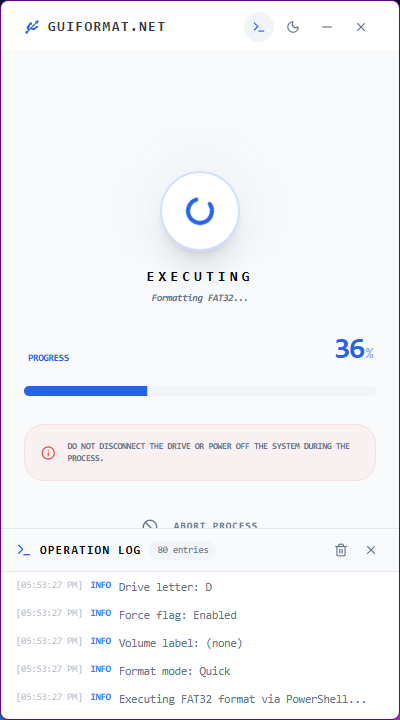
- Wait for Completion: It does take only a few minutes, depending on the size of the drive.
After this is done, your drive is now ready for use as FAT32.
Step 3: Restore Your Files After Formatting

Once it’s done, your drive runs on FAT32. All that’s left is to move your data back.
Copy Your Backup Back to the Drive
Open your backup location and copy the files back to the newly formatted FAT32 drive. Transfer time depends on the data size; small files may take minutes, while larger backups take longer.
Once done, don’t assume everything is perfect. Open a few files directly from the drive to confirm they work properly.
Check key file types like:
- Documents
- Photos
- Videos
- Music files
- Compressed archives
This quick check ensures your data was restored correctly and is fully accessible.
Check That the Drive Is Now FAT32
Finally, confirm that the conversion was successful.
In Windows File Explorer:
- Right-click the drive.
- Select Properties.
- Look for the File System field.
If everything went according to plan, it should display FAT32.
Congratulations! You’ve successfully converted your NTFS drive to FAT32 without losing your data.
FAT32 vs NTFS: Which One Should You Use?
After converting, you might wonder whether FAT32 is always the better option.
The answer depends on your needs.
Choose FAT32 If:
- You need maximum device compatibility.
- You’re using USB drives and SD cards.
- Your files are generally smaller than 4GB.
- The drive will be used across different operating systems and devices.
Choose NTFS If:
- You regularly work with large files.
- You need advanced security features.
- The drive is primarily used with Windows.
- Performance and reliability are more important than compatibility.
Neither file system is universally better. The right choice depends on how you plan to use the drive.
Final Thoughts
Converting NTFS to FAT32 without losing data is simpler than most people think.
The trick isn’t some secret hack; it’s just about following the right steps. First, make sure you back up all your files. Then, use GUI Formatter to change the drive over to FAT32.
It takes a little extra time, but it’s the safest and most reliable way to protect your files.
For better device compatibility, FAT32 is still one of the best choices for USB drives and SD cards, and GUI Formatter makes the whole process quick and easy.


